This tutorial picks up after our A2 Hosting WordPress installation tutorial where we went through the installation process with A2 Optimized pre-installed.
This tutorial requires LiteSpeed. You will need one of the A2 Hosting Turbo plans, such as the Turbo Boost plan, currently $5.99 per month during the Black Friday sale.
If you do not have the Turbo plan, we recommend following our W3 Total Cache with Cloudflare tutorial instead, as this doesn’t require LiteSpeed, and it works great with the cheapest A2 Hosting Plan. You can still use the A2 Optimized plugin, but the LiteSpeed Cache plugin will not implement page caching.
A2 Hosting WordPress Installation Recap
As mentioned, this tutorial presumes you have already installed the A2 Optimized version of WordPress. If you haven’t already done so, please follow this tutorial.
You should now have a version of WordPress installed with the following plugins pre-installed:
- A2 Optimized WP
- Akismet Anti-Spam
- EWWW Image Optimizer
- Jetpack
- LiteSpeed Cache
- WPForms Lite
Your WordPress plugins page should look like the following:
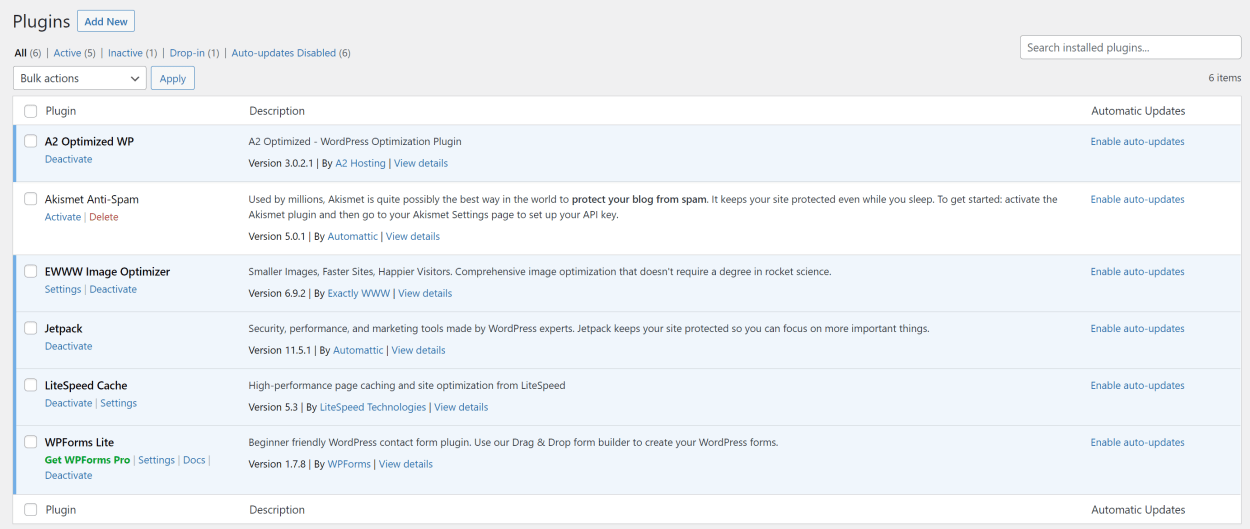
The A2 Optimized and LiteSpeed Cache plugins will be pre-configured with basic optimizations.
This tutorial will review and modify a small selection of the settings.
First, let’s take a quick look at the A2 Optimized Plugin.
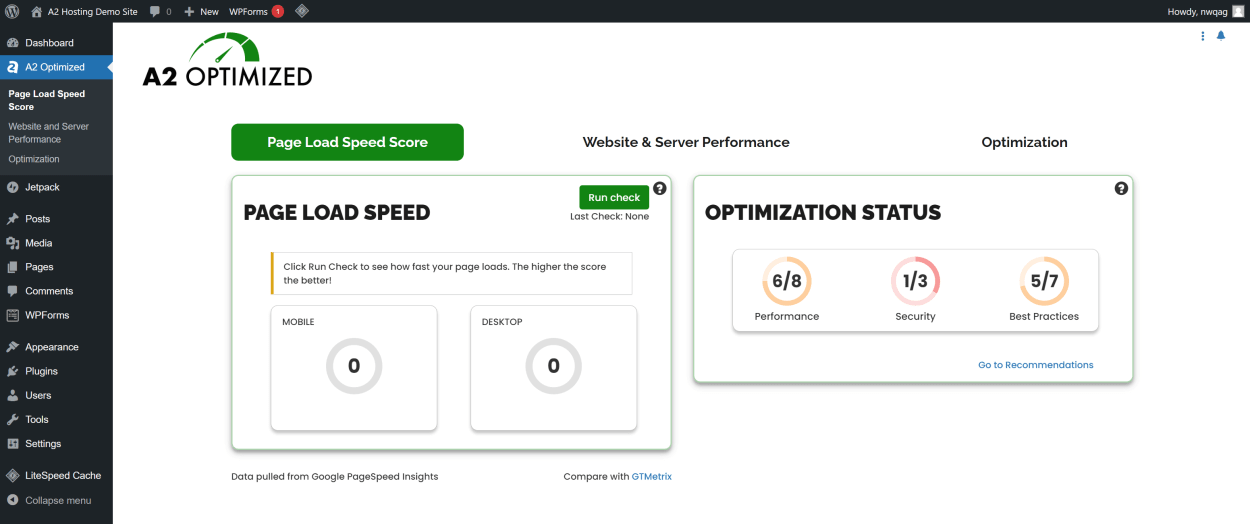
What is the A2 Optimized Plugin?
The A2 Optimized plugin helps optimize, secure, and implement best practices for your WordPress site.
The plugin has three sections:
- Page Load Speed Score
- Website & Server Performance
- Optimization
You can see the A2 Optimized Home Screen below.
We’ll cover each section in detail in the tutorial, along with LiteSpeed Cache settings.
Let’s get started right now.
How to Configure the A2 Optimized and LiteSpeed Cache Plugins
Click the ‘LiteSpeed’ option in the left-hand menu.
We’ll start with the LiteSpeed settings, so the performance figures in the A2 Optimized dashboard are more meaningful.

Click ‘General’ in the left-hand menu, and click ‘Request Domain Key’.
First, we need to set up a domain key to enable various enhanced features, such as the free CDN from QUIC.cloud. QUIC.cloud caches both static content (images, CSS files, etc.) and dynamic content (HTML page).
If you refresh the page after around 15 seconds, you should see that the Domain Key has been approved.
Click ‘Link to QUIC.cloud’ button to associate the site with a QUIC.cloud account.
Link your site to QUIC.cloud by clicking the button shown.
Register with QUIC.cloud.
Enter your email, click the “Sign in / up” button, or sign in with third-party authentication.
Follow the onscreen instructions to complete the account sign-up.
Then head back to the WordPress Dashboard.
Obtain your Server’s IP Address.
Log in to your cPanel control panel and note your server’s IP address. You will need it in the next step.
You will find your Server’s IP address in the General Information section on the right-hand side.
Enter your server’s IP address where shown.
Under the General Section, scroll down and enter your Server’s IP address.
Then click “Save Changes”.
Configure LiteSpeed Cache Preset.
In the left-hand menu, click the “Presets” option. Then apply the “Advanced (Recommended)” preset.
A pop-up box will appear. Click “OK” to confirm.
Update Nameservers.
You will see a message that you need to update your nameservers to QUIC.cloud.
In this tutorial, they are:
- mike.quicns.net
- jon.quicns.org
But you should configure them to whatever is stated in the notification at the top of the WordPress dashboard.
QUIC.cloud should automatically import all your existing DNS records, but you should check by logging in to the QUIC.cloud admin area and clicking on DNS Zones in the menu. Alternatively, click this link: https://my.quic.cloud/dns/zones, and then select “Manage Zone”. We found that we had to add a couple of subdomain entries.
It may take up to 24 hours for the nameservers to update.
You will note in the image it says “CDN Bypassed”. This is because it takes around 20 minutes for the CDN to configure the SSL certificate. It will be active shortly after.
A2 Optimized Plugin.
Click the A2 Optimized link in the left-hand menu to access the A2 Optimized plugin dashboard.
A2 Optimized Plugin: Check Page Load Speed Score.
To obtain your Page Load Speed Score click the “Run Check” button. It will use Google’s PageSpeed Insights to check the speed of your website.
A2 Optimized Plugin: Website & Server Performance
To see a more detailed summary of your site performance, click the “Website and Server performance” option in the sidebar or at the top of the page. You will see how your server and website perform and any recommendations for improvement.
In our example, we already score 100%.
A2 Optimized Plugin: Optimization – Performance.
Click the Optimization link in the left-hand menu. Then make sure you are on the “Performance” tab, as shown in the screenshot below.
In our example, A2 Optimized lists eight things that should be optimized, of which six are already done:
- Gzip Compression Enabled
- Object Cache
- Minify HTML Pages
- Minify CSS and Javascript
- Schedule Automatic Database Optimizations
- Compress Images on Upload
- Turbo Web Hosting
- Use System Cron Instead of WordPress Cron
If you click on each item, you will get further details of what it is, how it works, and what it impacts.
We suggest enabling all optimizations and then clicking update.
A2 Optimized Plugin: Optimization – Security.
Click the “Security” tab, as shown in the screenshot below.
In our example, A2 Optimized lists three things that should be optimized, of which one is already done:
- Lock Editing of Plugins and Themes from the WP Admin
- Login URL Change
- CAPTCHA on comments and login
If you click on each item, you will get further details of what it is, how it works, and what it impacts.
We suggest enabling all optimizations and then clicking update.
Record new login URL.
The new login URL should be emailed to you, but if you don’t receive it, you can follow the instructions here.
Click Settings -> Easy Hide Login in the left-hand menu.
Record the slug text for your new login.
In our example, our new login URL would be: https://a2hosting.thewebmaster.dev/?mvnc
A2 Optimized Plugin: Optimization – Best Practices.
Navigate back to the A2 Optimized Plugin dashboard, and click the “Best Practices” Tab.
Review all these settings, and modify them as you see fit.
We recommend deleting any unused themes and regenerating wp-config salts.
You should log out and log back in after making these changes.
A2 Optimized Plugin: Optimizations Complete.
Congratulations. You now have a fully optimized WordPress installation.